
Hair system tape is one of the most popular attachment methods for modern hair systems because it’s clean, consistent, and easy to learn. If you’re comparing hair adhesive and tapes, or deciding between tape vs glue, the right choice usually comes down to your scalp chemistry, lifestyle, and how often you remove your unit.
In this guide, you’ll learn what hair system tape is, how different hairpiece tapes work, how to apply hairpiece adhesive tape properly, and how to remove hair system tape without damaging the base or irritating your skin. You’ll also get practical tips to improve comfort and hold whether you wear daily or for extended periods.
What Is Hair System Tape?
Hair system tape is a double-sided adhesive tape made specifically to bond a hair system base (lace, skin/poly, or mono) to the scalp. Unlike random craft tape, hair system tape is designed to handle sweat, oils, and movement while still being removable with the right technique.
If you’re new to non-surgical hair replacement, understanding What Is a Hair System can help you see how different base materials and attachment methods work together.
Most wearers choose hair system tape because it:
- Applies quickly and evenly
- Allows predictable hold times
- Can be gentler than some liquid adhesives (depending on skin type)
- Pairs well with both partial bonds (perimeter) and full bonds
When people say “tape,” they often mean different formats of hairpiece tapes: roll tape, pre-cut contour strips, or mini tabs. All are types of hair system tape, and each is easier in certain situations.
Types of Hairpiece Tapes
Hairpiece tapes vary by hold strength, finish, thickness, and skin sensitivity. If you’re new, start with a tape designed for your wear schedule and scalp type, then adjust. Many people rotate hairpiece tapes seasonally (hot weather vs cool weather) or based on activity level.
1. Daily Wear Tapes
Daily wear tapes are designed for frequent removal and cleanup. They’re often a smart first choice if you’re learning hair system tape or if you prefer to remove the system nightly.
Typical features:
- Easier cleanup than heavy-duty options
- Lower residue buildup
- Great when you want flexibility (gym days, scalp treatments, frequent re-alignments)
Daily wear hairpiece tapes can also reduce the need for harsh solvents when you remove hair system tape often.
2. Extended Wear Tapes
Extended wear tapes are built for longer holds and higher stress (heat, sweat, oily skin). If you want fewer reattachments, extended wear hair system tape may be the better route.
Typical features:
- Stronger bond over multiple days
- Better edge security
- More residue possible during removal
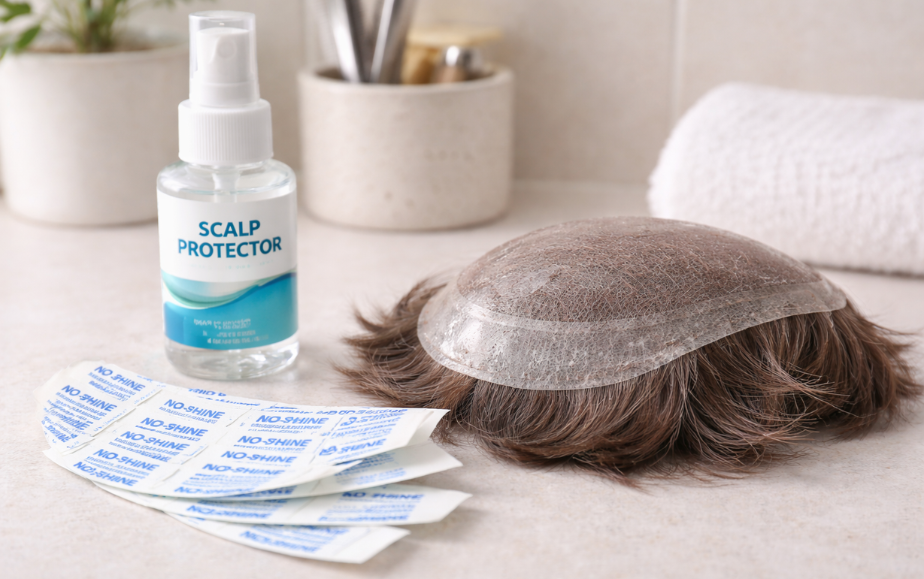
With extended wear, careful prep matters more. A good scalp protector plus the right hairpiece adhesive tape can make a big difference.
3. Sensitive Skin Tapes
Sensitive skin tapes are formulated to reduce irritation. They may not last as long as heavy-duty hair system tape, but they’re often worth it if you get redness or itching.
Typical features:
- Gentler adhesive profile
- Often less aggressive removal
- Good for patch testing and new wearers
If you’re sensitive, consider testing both hairpiece tapes and liquid options. In the hair adhesive and tapes category, “strongest” isn’t always “best” for comfort.
Hair Adhesive and Tapes: What’s the Difference?
Adhesive and tapes are both attachment methods, but they behave differently.
Hair system tape (tape-based bonding) tends to:
- Go on faster
- Create consistent thickness across the bond
- Offer clean edges when placed correctly
- Be easier for many people to remove and reapply
Liquid adhesive (glue-based bonding) tends to:
- Allow very precise hairline work (when applied well)
- Feel lighter for some wearers
- Require more drying time and technique
- Be more sensitive to sweat/oil if prep isn’t perfect
Many experienced wearers combine hair adhesive and tapes: tape around the perimeter for stability and a thin layer of adhesive at the hairline for an invisible finish. If you’re undecided on tape vs glue, a hybrid method is often the most forgiving.
Tape vs Glue: Which Is Better for Hair Systems?
Tape vs glue isn’t a one-size-fits-all decision. The better choice depends on your routine, climate, and the base material.
Choose hair system tape if you want:
- Faster application with less mess
- Predictable cleanup
- Strong perimeter security
- Easy touch-ups using small tabs of hairpiece adhesive tape
Choose glue if you want:
- Maximum hairline realism (with practice)
- A very thin bond layer
- More custom control in specific areas
Tape vs glue for beginners: Tape is usually easier. You can learn placement, tension, and alignment without also mastering drying time, tackiness, and thin coats.
Tape vs glue for oily skin or heavy sweating: Strong hair system tape often holds up well, but prep is critical. Try different hairpiece tapes and consider scalp protectors.
Tape vs glue for sensitive skin: Sensitive hairpiece tapes may be easier to tolerate than some adhesives, but reactions vary you should patch test either way.
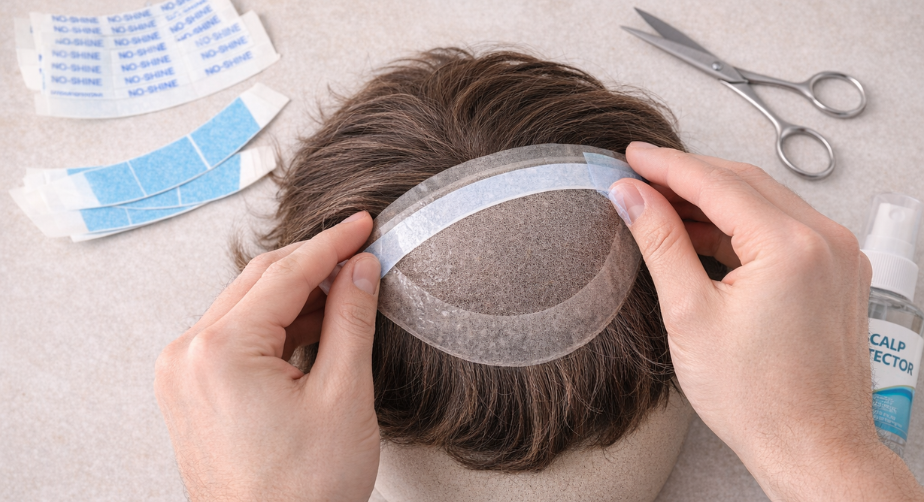
How to Apply Hairpiece Adhesive Tape
A clean, consistent application is the difference between a comfortable hold and constant lifting. Here’s a simple, repeatable process for hairpiece adhesive tape.
- Remove old residue completely
Clean your scalp and the base. Old adhesive reduces the performance of hair system tape and can create uneven bumps. - Clean the skin (no oils)
Use an oil-free cleanser or alcohol-based prep (if your skin tolerates it). Hair adhesive and tapes both fail faster on oily skin. - Protect the skin (optional but helpful)
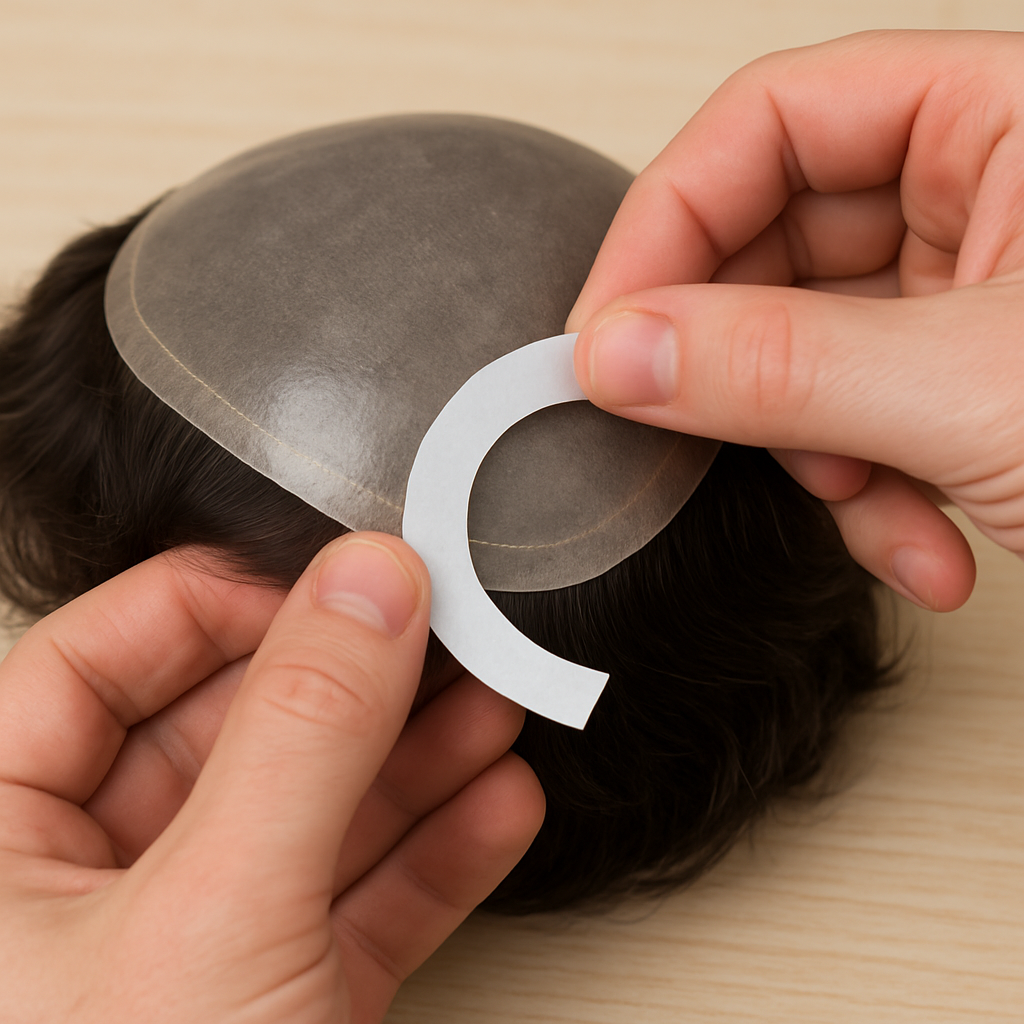
A scalp protector can improve hold and reduce irritation—especially with stronger hairpiece tapes. - Apply the hairpiece adhesive tape to the base
- For lace: many people prefer tape tabs/contours and avoid covering too much lace for breathability.
- For skin/poly: hair system tape usually bonds very securely, but align carefully because it can grab quickly.
- Press firmly and evenly
Use steady pressure along the tape line. Avoid stretching the base. - Attach the system in sections
Line up the front first (or your preferred anchor point), then lay down the rest gradually to prevent wrinkles. - Final press and edge check
Press the perimeter again. Check temples and nape they are common lift zones.
If you’re comparing tape vs glue, notice how “forgiving” tape feels during alignment. With hairpiece adhesive tape, you can often correct placement more easily than with wet glue.
How to Remove Hair System Tape Safely
Rushing removal is how bases tear and skin gets irritated. The goal is to break down the bond slowly and keep the base supported.
- Loosen an edge first – Start at the nape or a corner. Never rip straight upward.
- Use a proper adhesive remover – Apply remover to the tape area and wait a minute. This step matters with stronger hair system tape and extended-wear hairpiece tapes.
- Peel back slowly while supporting the base – Keep the base close to the scalp as you peel. Slow pressure beats force.
- Clean the scalp and base separately
- Scalp: remove residue gently (avoid over-scrubbing).
- Base: soak tape areas if needed, then wipe residue off carefully.
- Wash and reset – Finish with a gentle cleanser so the next hairpiece adhesive tape bond is clean and consistent.
If you wear hair adhesive and tapes in a hybrid method, remove tape first, then address any glue at the hairline last (so you’re not pulling delicate front areas).
Tips for Longer Hold and Better Comfort
Small adjustments can dramatically improve how hair system tape performs.
- Match tape strength to your schedule
Daily wear hairpiece tapes for frequent removal; extended wear hair system tape for multi-day holds. - Use the right amount
More tape isn’t always better. Too much hairpiece adhesive tape can increase cleanup time and trap heat. - Control sweat and oil
Clean prep helps both hair adhesive and tapes last longer. If you sweat heavily, consider scalp protector and stronger hairpiece tapes in summer. - Avoid constant edge touching
Repeated checking can lift edges. Press once, then leave it alone. - Rotate products if irritation starts
If you feel burning, itching, or redness, switch to sensitive hairpiece tapes and simplify your routine. Tape vs glue might also change based on your skin. Persistent scalp irritation can also be related to underlying scalp conditions, and medical resources like this guide on Scalp Skin Conditions from the International Society of Hair Restoration Surgery explain how issues such as dandruff or seborrheic dermatitis can affect scalp comfort and hair health. - Store and handle the system gently
When the base stays in good condition, hair system tape bonds more evenly and comfortably.
Professional Hair System Maintenance in Orange County
If you want your bond to look cleaner and last longer, professional maintenance can help—especially if you’re experimenting with hair adhesive and tapes, testing tape vs glue, or switching base types.
In Orange County, a maintenance visit typically includes:
- Scalp and base cleanup (removing old hair system tape safely)
- Re-bonding with the right hairpiece tapes for your lifestyle
- Hairline alignment and blending
- Advice on which hairpiece adhesive tape works best for your skin and activity level
A pro can also spot issues early (edge wear, base stress, irritation patterns) and recommend changes in tape placement or product choice. If you’re constantly redoing bonds, the fix is often simple: better prep, a more suitable hair system tape, or a smarter mix of hair adhesive and tapes.